Today we’re going to be making a 3D printed arm rest for a classical guitar.
I will show you how the rest was designed, and you will be able to download the 3D STL file at the end so that you can have a go at printing your own.
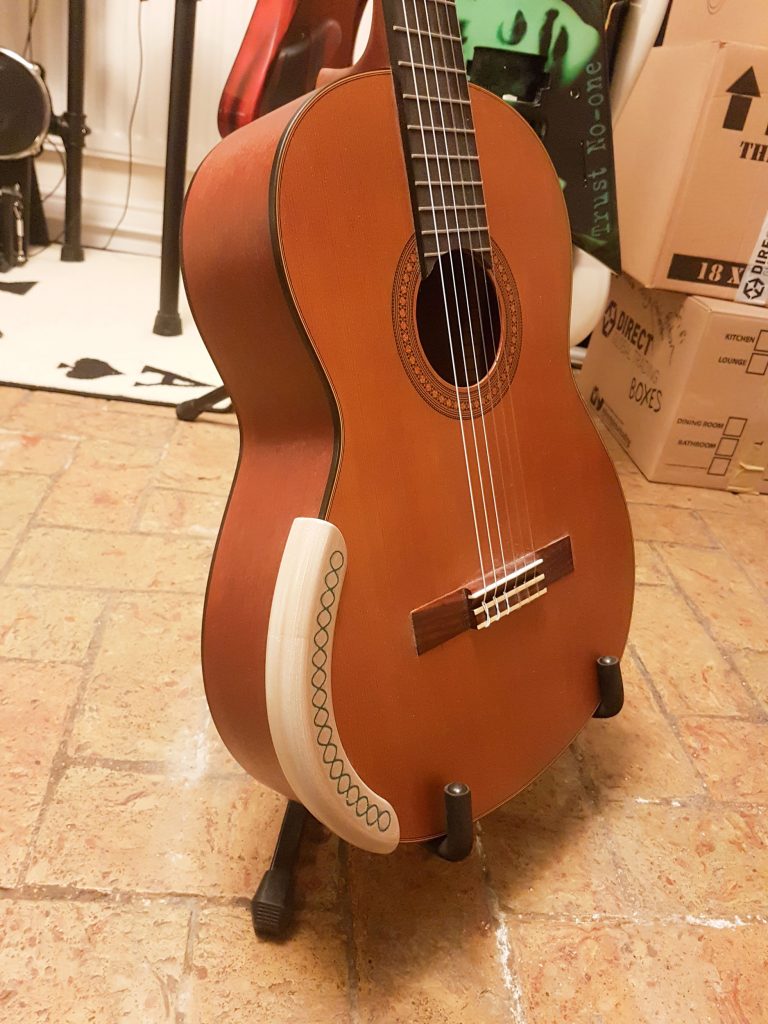
Unlike most electric guitars which are contoured to fit the body, classical guitars have fairly sharp corners so fitting an arm rest can make the experience much more comfortable.
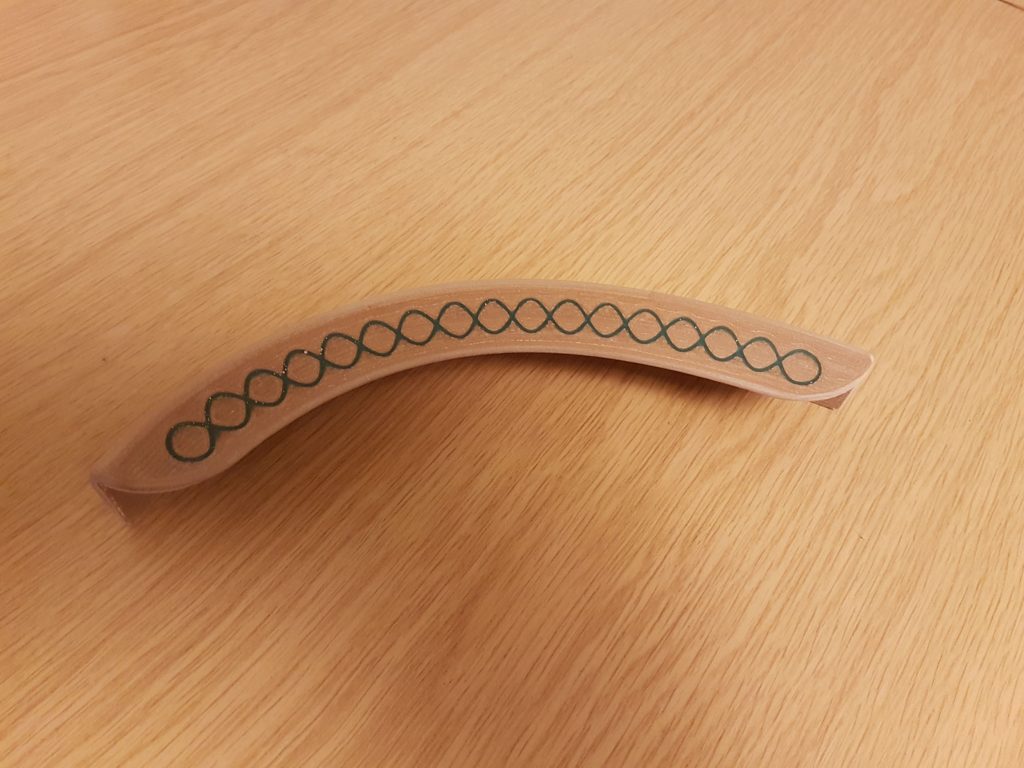
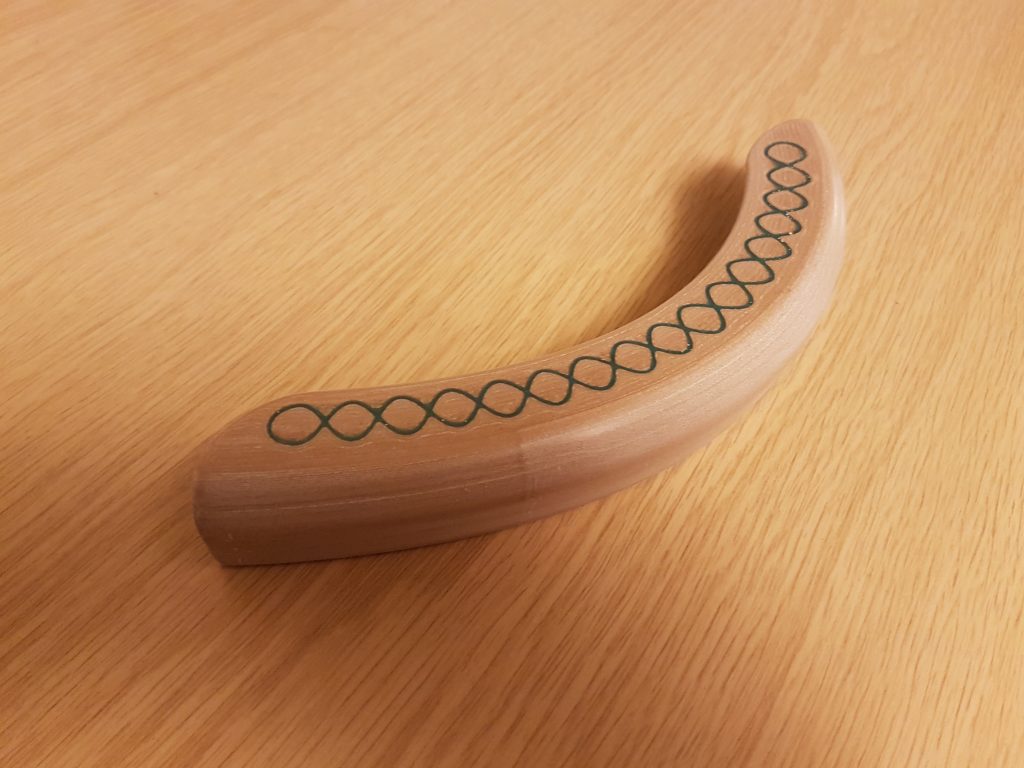
The arm rest we are going to make is 3D printed using a wood filament and has a coloured resin inlay in the top.
The Design
My favourite weapon of choice for designing 3D printed articles is Fusion 360 by Autodesk. It’s professional grade CAD software, immensely powerful and best of all – free for non-commercial hobby use.
The first thing to do was to take a photograph of the guitar body so that I had a reference for the profile of the guitar that I could trace in Fusion 360.
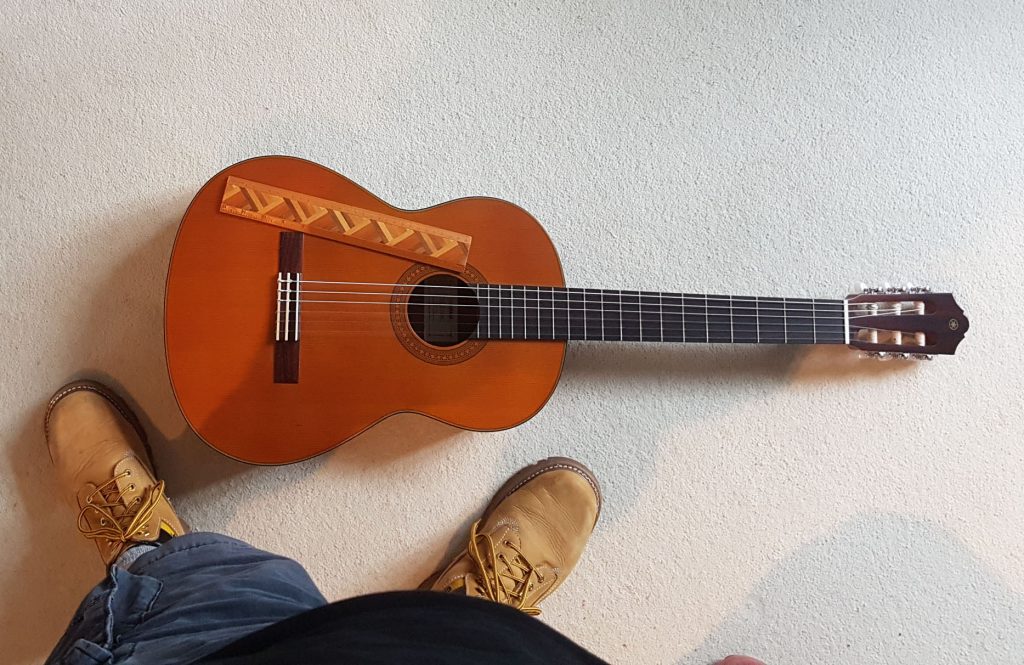
I put a ruler on top so that when I imported the photo into Fusion 360 I could get an idea of the actual dimensions I would need to work to. Taking the photo from high up reduces any camera lens distortion and weird perspective effects that would occur if the photo was taken close up.
Once inside Fusion 360 the first thing was to create a sketch (everything starts as a sketch in Fusion) and draw a spline (programmatic curve) that matched the profile of the guitar body. And then create another sketch of the cross sectional profile that I wanted to I could sweep that along the spline to get the basic shape that I wanted.
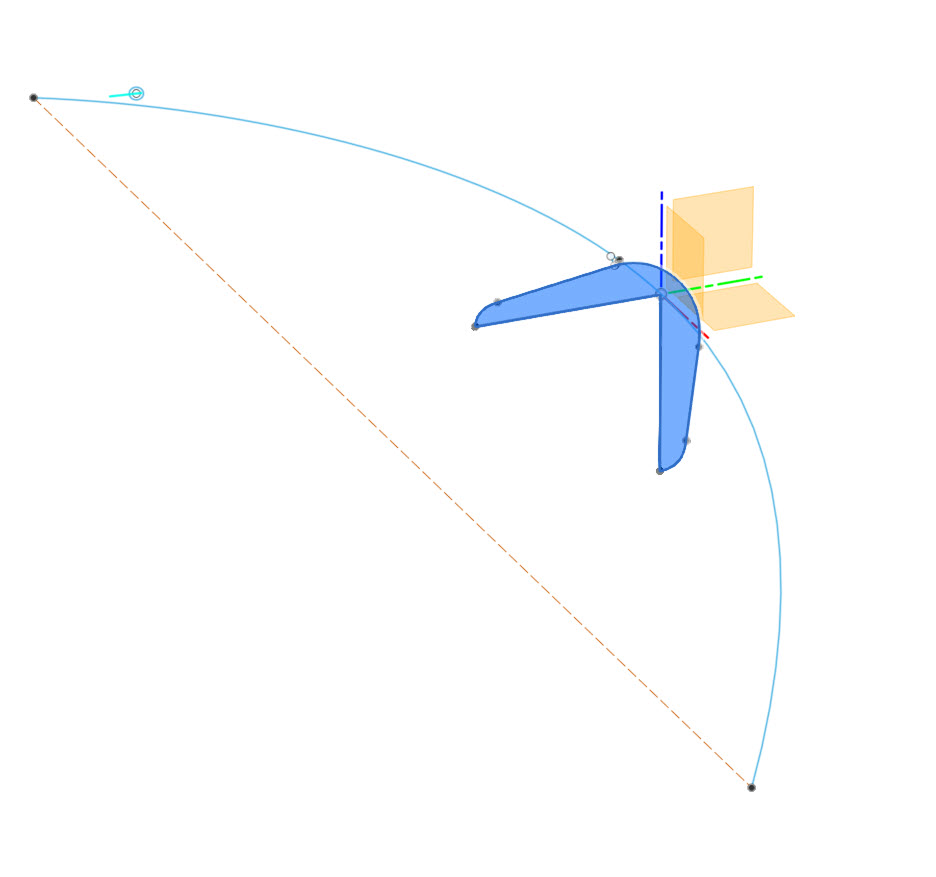
In the above sketch you can see the spline is the light blue curve, this matches the shape of the guitar body. The darker shaded blue shape is the cross section that I want and this will be swept along the spline to create a solid body.
With the main body created it was just a case of creating some radii at each end to use to cut the ends to a nice radius, and to fillet the edges to round them over.
Here’s a time-lapse of the design process in Fusion 360.
One of the trickiest parts of the design was the repeating circular inlay, that took way longer than it should have. It would have been easier to pull the 3D model into Blender and apply the decoration in that as Fusion 360 can be a bit rigid sometimes.
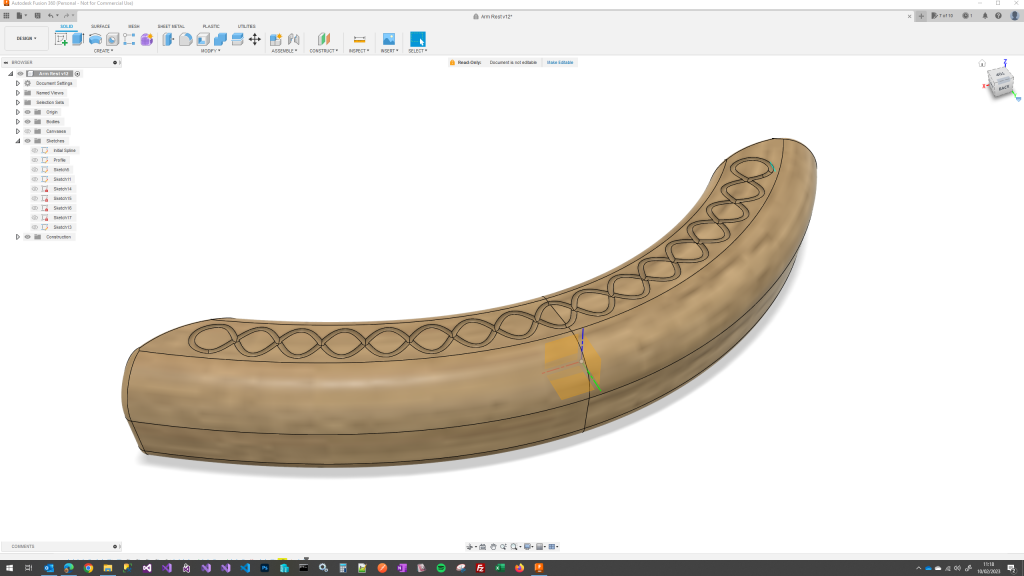
Here you can see the finished 3D model – rotate it in your browser using your mouse or by touch…
3D Printing
Now the fun part, printing it out!
I will provide download links at the end of the article, but for now we will talk about how to print the guitar rest.
The printer I used was a standard Mk.1 Creality Ender 3. I love this printer as it’s really affordable and does pretty much everything I want it to do.
The filament I chose was a PLA / Wood composite which is PLA filament that is loaded with a high content of sawdust to make a kind of printable wood.

The idea behind the wood filament is that it is supposed to end up looking and behaving like wood. The reality is that while the end product does look a bit like wood, it also still looks a lot like plastic and it is difficult to print as the wood fibres tend to clog up the printer nozzle. I used a 0.4mm nozzle but would recommend you look at using a 0.6mm nozzle for printing wood filaments.
The wood filament smells really nice while printing, you actually get the smell of a woodwork shop when printing. But that’s about the only benefit that I see of using it. Though it sands reasonably well, I doubt if I would use it again and would probably opt for an all plastic filament next time.
My preferred slicing software is Cura, and this integrates really well with Fusion 360. Once you’ve designed your model in Fusion, you go to the Make tab in Fusion and can spit the finished model straight into Cura where you can configure things and slice the model ready for printing.
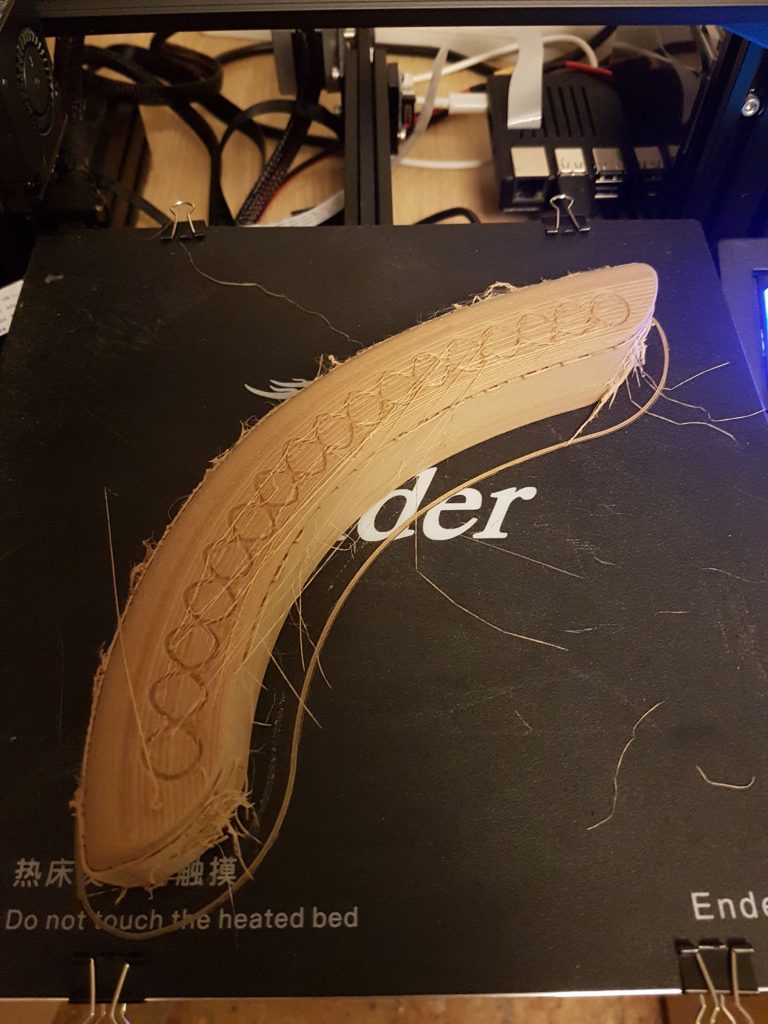
I will link to the Cura 3mf file for the project below so you can see how I configured the model for printing, but the basics are to print with the inlayed design uppermost and use supports.

Because the upper surface is sloped you will get a lot of stepping in the print which needs to be sanded flat at the end. Using a smaller layer height can reduce this so you will need to balance layer height vs print time. Smaller layers means longer print times.
For this one I just used the standard Ender 3 Mk.1 textured print bed. No problems there.
Finishing
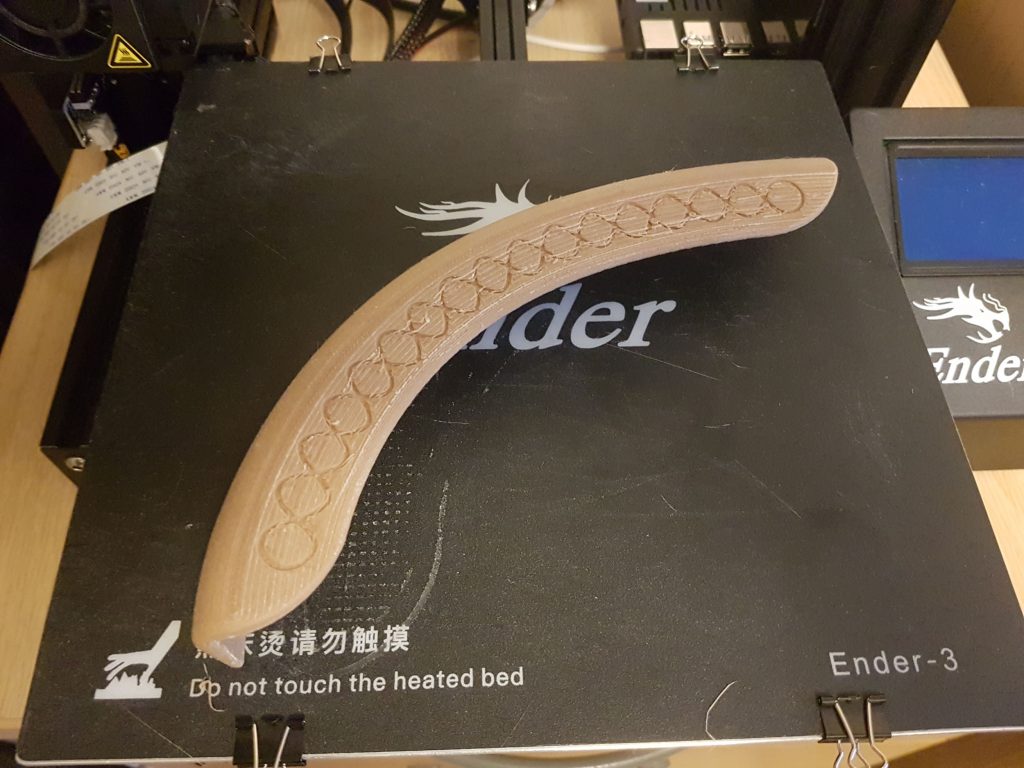
Plenty of clean up to do, but the supports came away cleanly.

After some sanding and cleaning up with a sharp knife we’re ready for resin.
The resin I used was GlassCast 50 from EasyComposites. This is what I had lying around, GlassCast 3 or 10 would have been fine for this – the number reflects the intended thickness of the cast resin. They all work much the same but the smaller numbers are optimised to give better results for thinner layers. No matter – it’s all getting sanded anyway.
The resin was coloured using a resin dye, poured into the decorative groove and allowed to cure for about 12 hours before sanding flat.
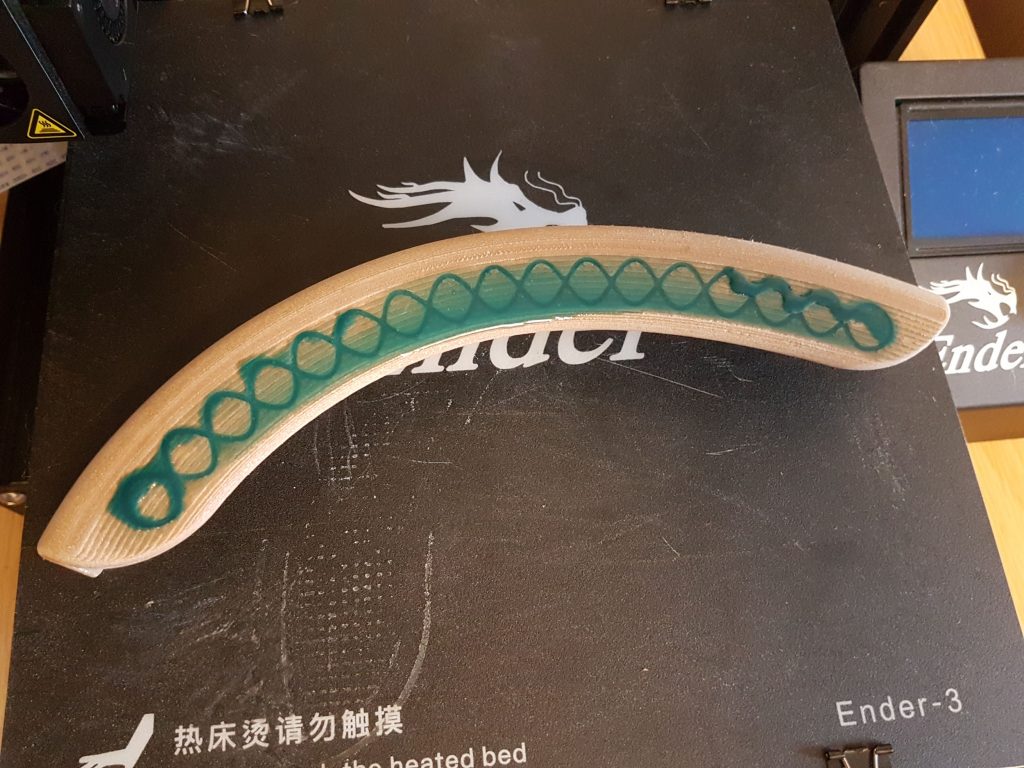
Sanding is best done with wet and dry paper, start at (say) 240 grit and then work up through the grits until you get the kind of finish you want. Wet sanding with water really speeds up the sanding process and helps stop the paper from clogging. 1200 grit is pretty fine and leaves a nice matt finish. You don’t need to varnish the guitar rest but you can do if you prefer a glossy finish or a stain.
I fitted mine to my guitar with a few very small blobs of white-tack. Be careful if your guitar is very valuable or you really care about the finish of the guitar as whatever you use to stick the guitar rest on with might eat away at the finish, or pull it off if you remove the rest at a later date.
Downloads
The files below are free to download and use, if you enjoy them and want to support the channel and help me to make more great content feel free to hit the “Buy me a Beer” links on the right or at the bottom of the page, or head over and join my Patreon.
Below you can download the files needed to print your own Classical Guitar Rest…
Guitar Rest STL File
The STL file is the raw 3D file that you can import into your preferred 3D Slicer Software.
Guitar Rest Cura Project 3mf File
The 3mf file is the Cura project file which contains the settings I used to print with. You will need to tweak the project file to suit your own printer and filament if you want to use it in Cura.