
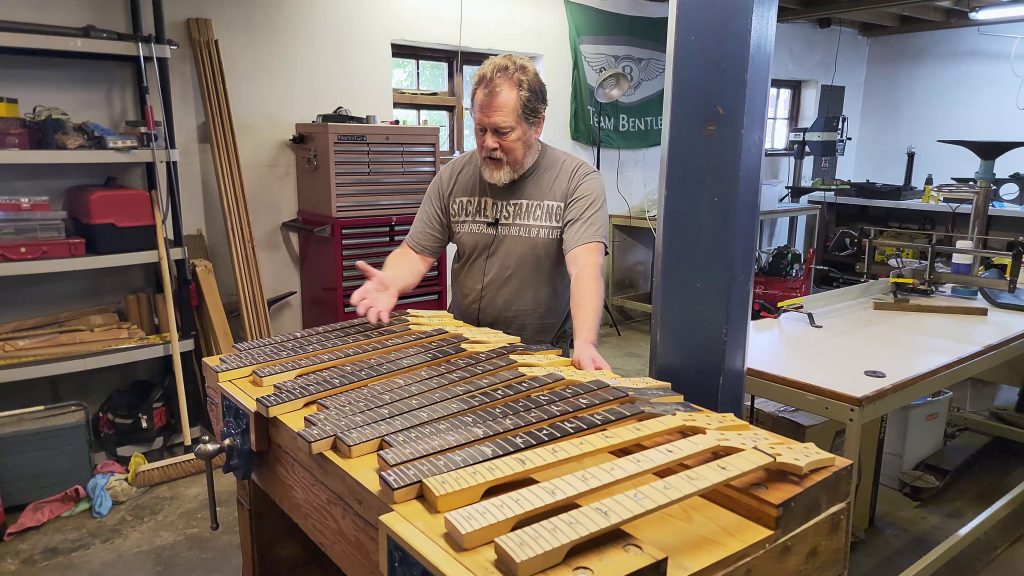
A Paul Reed Smith Mirror is not the sort of thing that usually turns up on a workshop bench, particularly when it begins life as sixteen guitar necks. Yet there they were, all beautiful bits of maple, rosewood and mother of pearl, destined for destruction because they had not met the famously exacting PRS quality standard.
They were warranty returns, repairs, or necks that had failed inspection. Nothing that could be sold on, quite rightly, but still far too nice to become landfill or forklift practice. Having done a little guitar work myself, including fret dressing and setups, I could not immediately spot the faults. That is why PRS employ people with sharper eyes than mine.
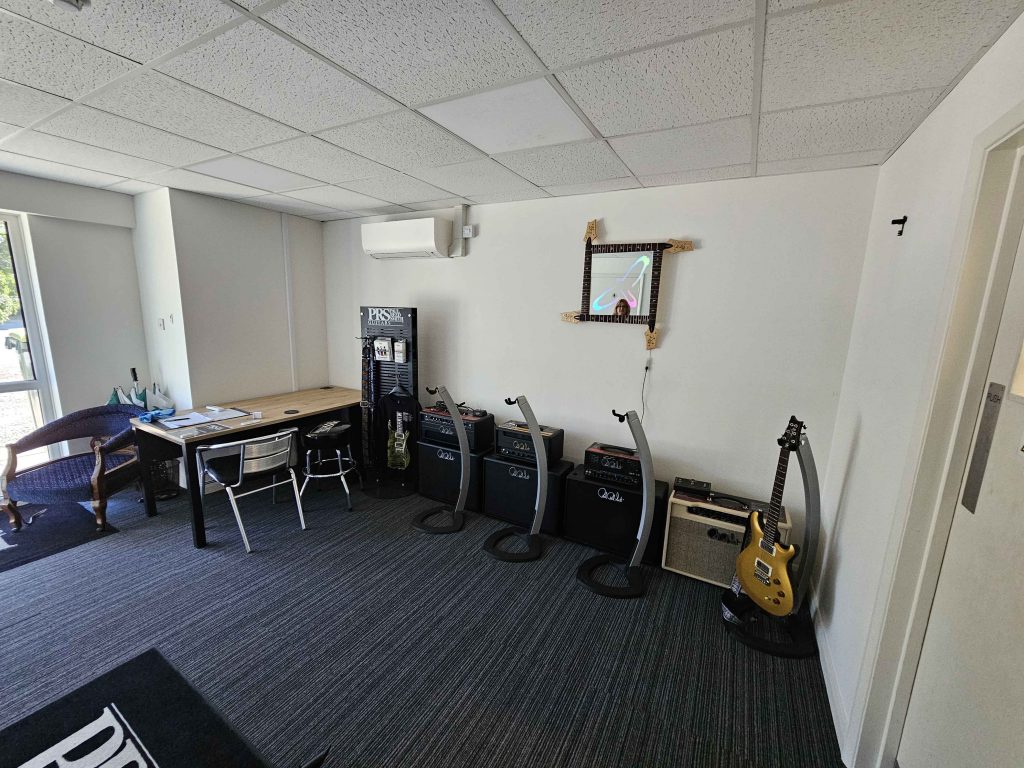
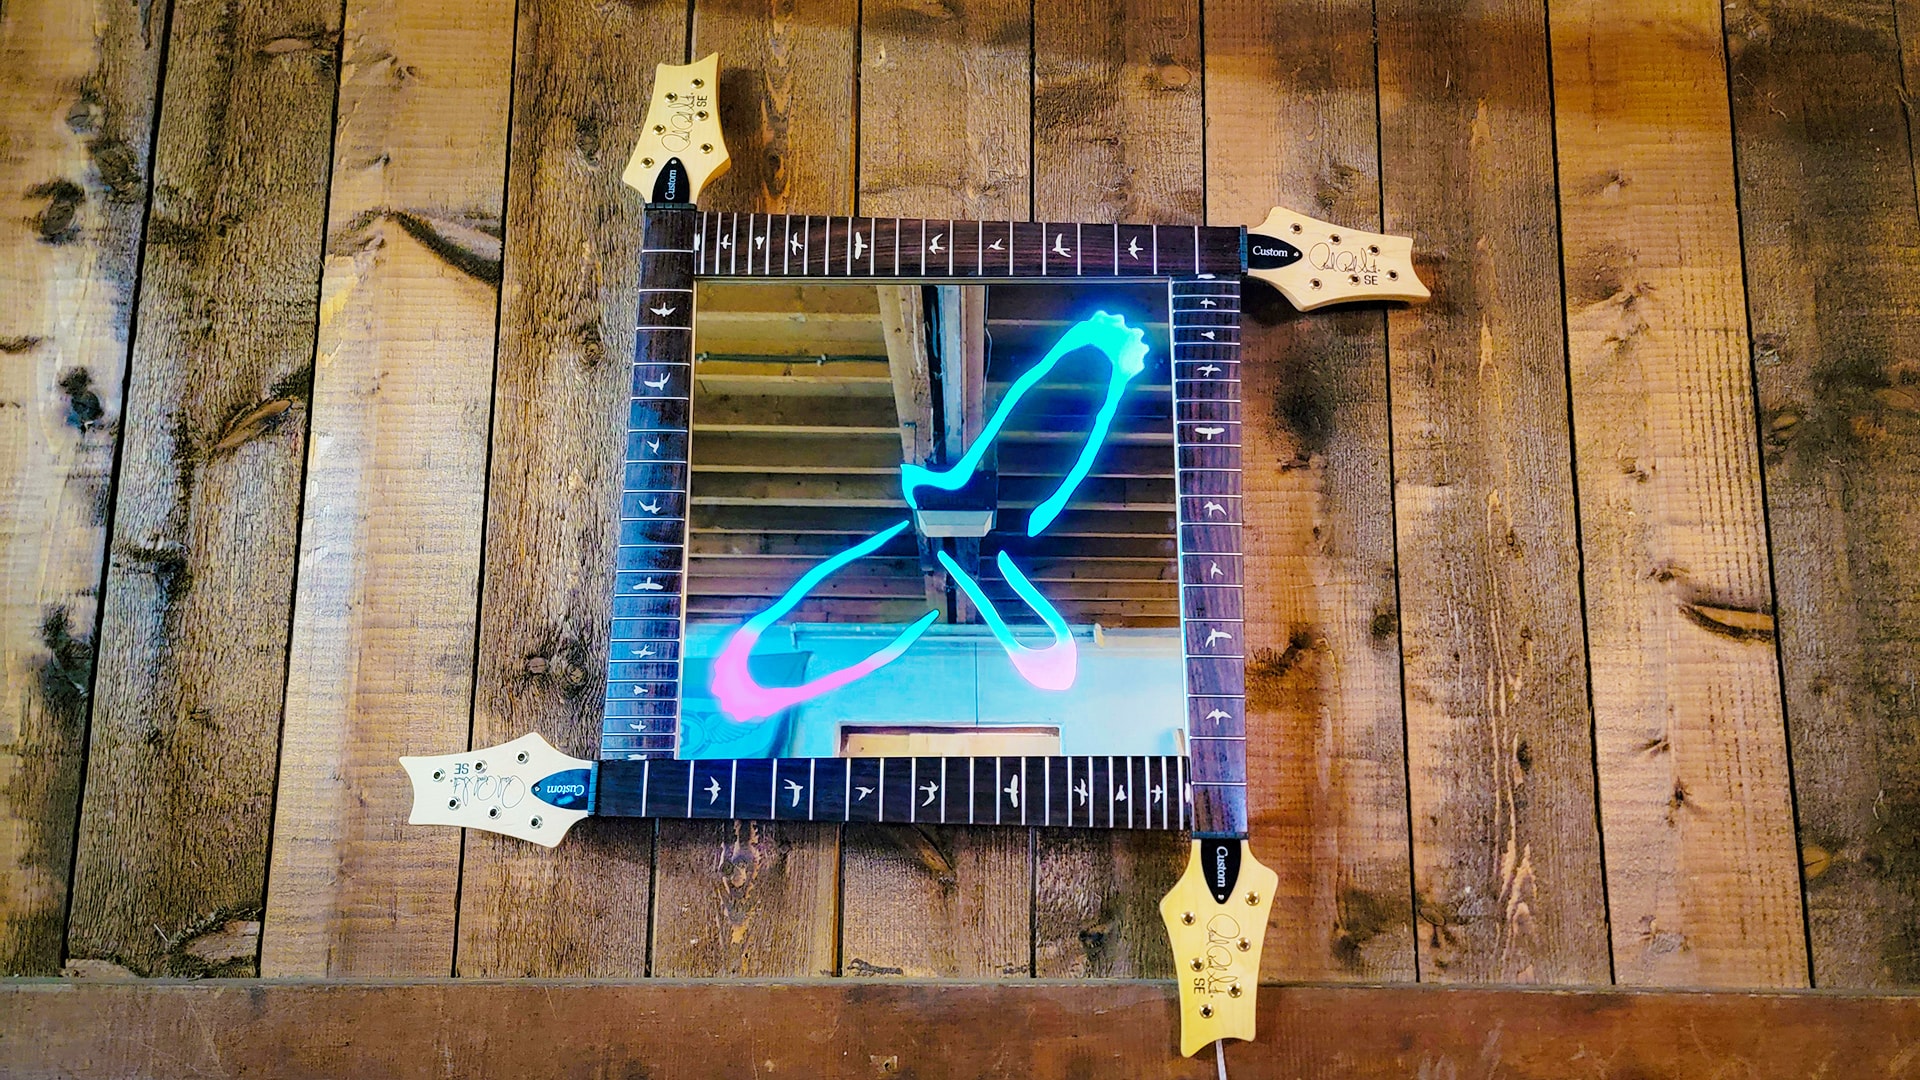
The sensible thing seemed to be giving a few of them a second life. Not as guitars, because that was never on the cards, but as something useful and decorative. The result was this rather unusual Paul Reed Smith Mirror, built from four matching necks, complete with an etched PRS bird and coloured backlighting.
Why Use Guitar Necks as a Frame?
PRS necks are lovely objects in their own right. The shaping, fretwork, bird inlays and headstock details are all beautifully made. Even as rejected parts, they have plenty of character.
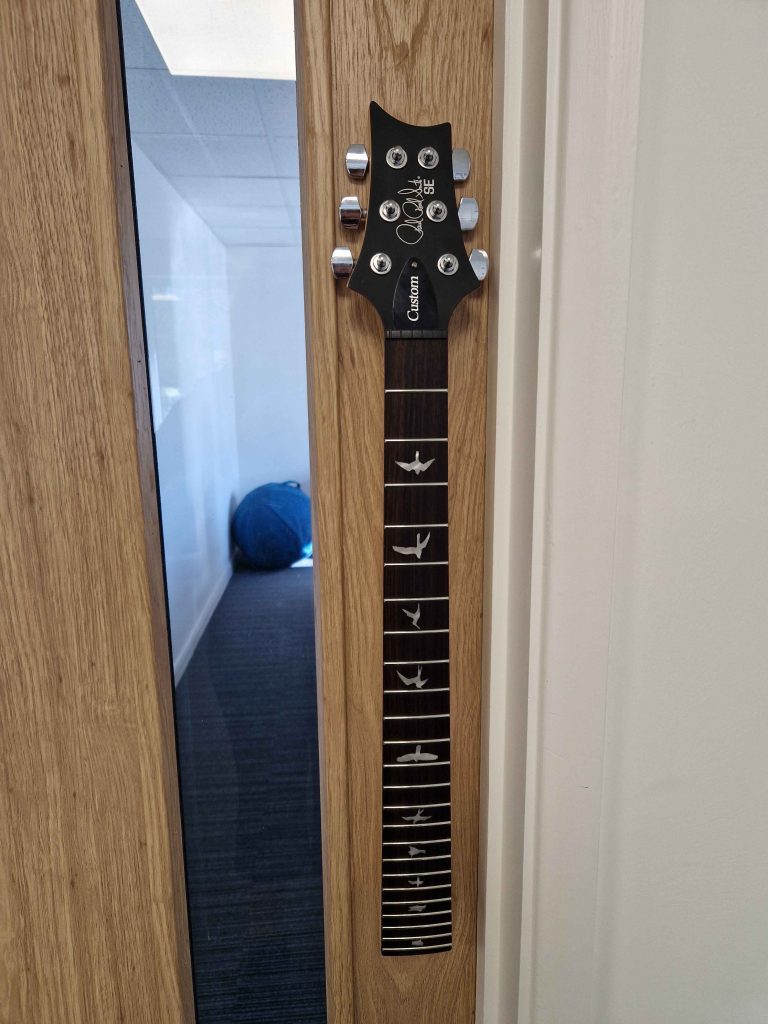
PRS already use discarded necks as door handles at their head office, which is a cracking idea. A guitar neck makes a surprisingly good handle, with the headstock providing a natural end detail. For this project, though, four necks looked as though they could make a rather striking square frame.
The plan was straightforward enough in principle:
- Select four necks with matching scale lengths and similar finishes.
- Join them into a square using hand-cut lap joints.
- Cut a rebate into the rear of the frame for a mirror.
- Etch a bird design into the mirror backing.
- Add RGB lighting in a shallow rear box.
As with many workshop plans, the straightforward bit ended roughly five minutes after the marking out began.
Selecting the Neck Set for the Paul Reed Smith Mirror
There were some particularly handsome blonde maple necks with mother of pearl bird inlays, but only three matched. A frame needs four sides, unless one is pursuing a very avant-garde design, so I chose four that worked together instead.
Matching the scale length mattered. The fret spacing needed to look consistent around the frame, and the necks had to be close enough in overall length to create a sensible square. The selected necks were arranged so the headstock logos would all read the right way up when the finished Paul Reed Smith Mirror was hanging on the wall.
That meant deciding the orientation before cutting anything. It is one of those tiny details that would look glaringly wrong afterwards, rather like fitting a picture frame upside down and then pretending it was intentional.
The Problem with Joining Guitar Necks
Guitar necks are not bits of square timber. They taper from nut to heel, their backs are rounded, and their thickness changes along their length. The fretboards also have a radius. In short, there are no convenient flat faces or reliable right angles to work from.
To make a square frame, each neck needed to meet the next one at a consistent angle while allowing the fretboard surfaces to line up neatly. The answer was a series of overlapping lap joints, carefully cut into the backs and ends of the necks.
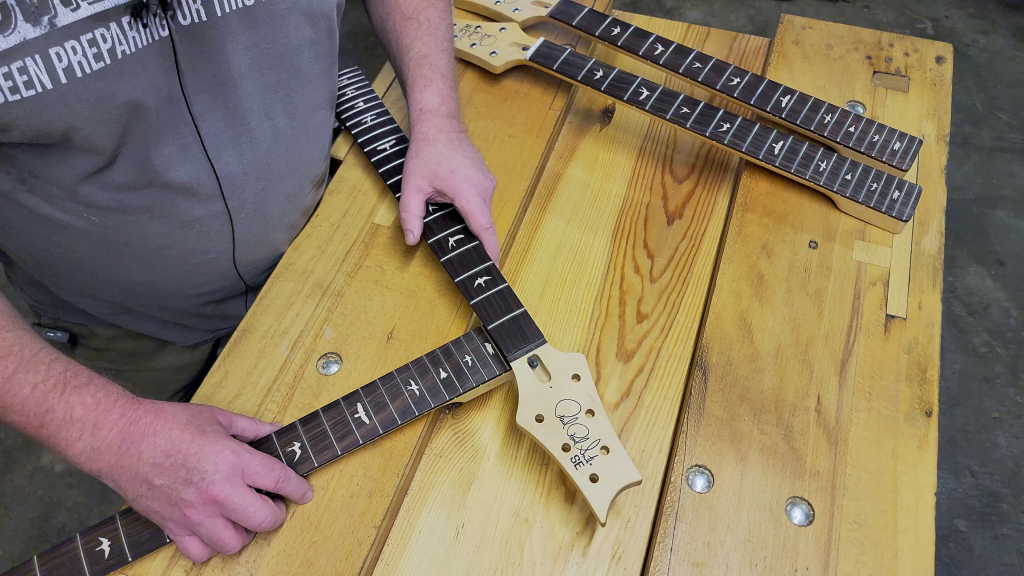
The joint did not need to be engineering-grade perfection, but it had to pass the Mark 1 eyeball test. If the fretboards sat unevenly or the corners looked badly twisted, the whole Paul Reed Smith Mirror would lose its charm.
Removing Frets Where the Joints Would Go
The first job was removing a couple of frets from the ends of the necks. Normally, fret removal is done cautiously, often with heat to soften any glue and avoid lifting wood from the fretboard.
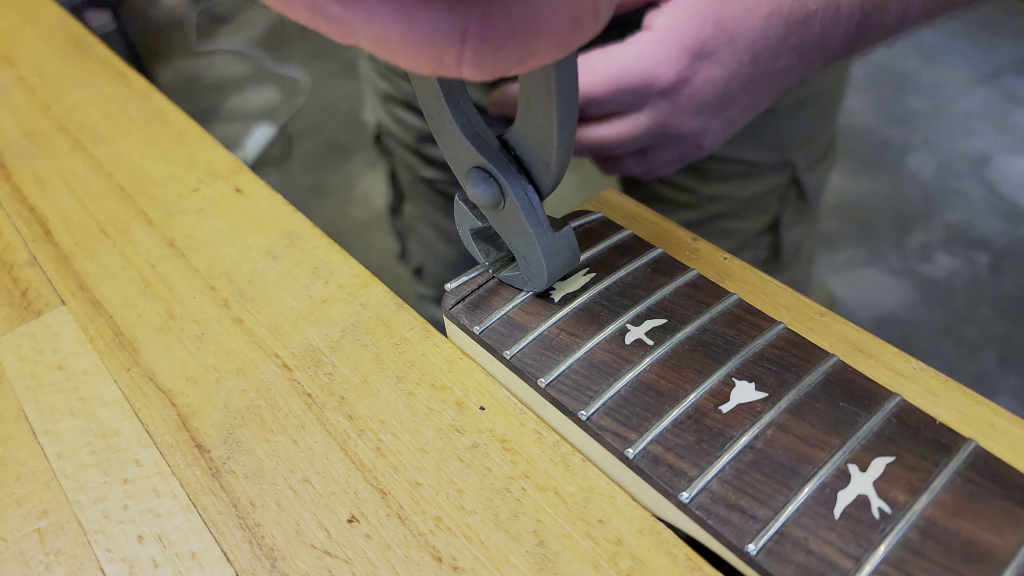
Here, the fretboard section was about to be cut away for the lap joint, so there was rather less need for delicacy. Flush-cut pliers lifted the frets out without much fuss, making room to shape the overlap.
Finding Centre Lines on a Tapered Neck
Because the necks taper, a centre line was needed to keep the assembly square. The width at one end was measured, halved, and marked. The same was done at the opposite end. Joining those marks gave a useful reference line down the back of the neck.
A pair of calipers made this very easy, although it was not a job requiring absurd precision. Woodwork is generally more forgiving than metalwork. A clear line is more useful than chasing fractions of a millimetre that will never be seen.
A mechanical pencil with soft 2B lead proved particularly handy. Softer lead leaves a dark line without needing to press hard enough to dent the surface, which is useful on nicely finished maple.
Cutting the Lap Joints by Hand
The four necks were arranged in their intended positions and marked directly against one another. The target was to bring the edge of one fretboard into line with the nut end of its neighbour, creating a square opening in the middle.
Each overlap was cut about halfway through the relevant section of neck. That gave enough material to form a strong joint while leaving room to hide the join from the front. The curved profile of the neck made this more complicated than simply sawing out a rectangular notch.
The joint had to account for:
- The taper of the neck from one end to the other.
- The rounded back profile.
- The curved radius of the fretboard.
- The need for the front faces to sit at compatible heights.
A simple paper template helped transfer the curved profile needed at the joint. Sharp chisels, a gouge and a half-round file did most of the work. Maple is hard, so blunt tools were not going to improve anyone’s afternoon.
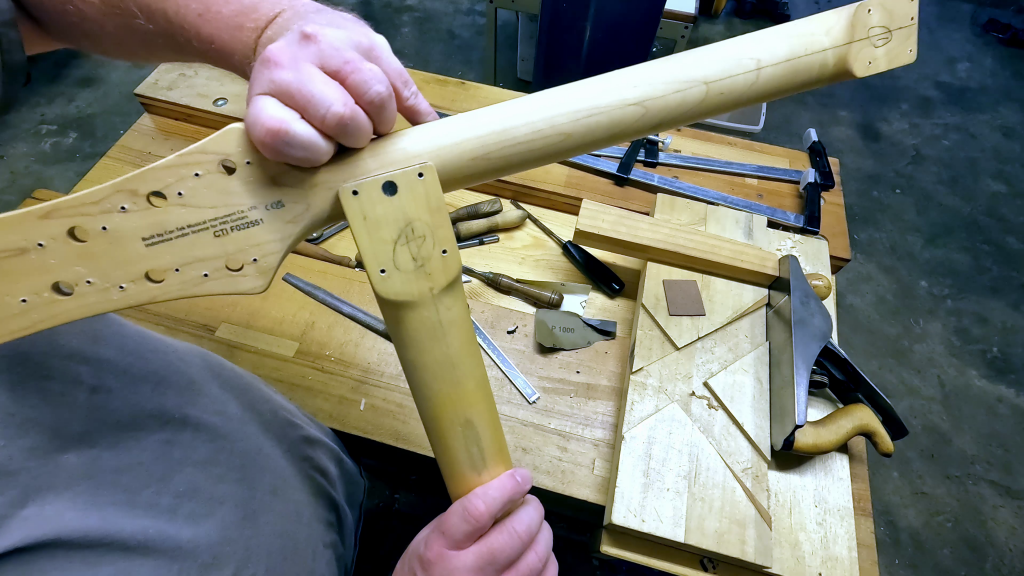
The approach was deliberately incremental. Cut slightly inside the line, test fit, remove a little more, then test again. It is much easier to remove another shaving than it is to put maple back once it has been enthusiastically chiseled into firewood.
The Truss Rod Surprise
One important complication lurked inside each neck: the truss rod. This is the steel bar that runs through a guitar neck and allows its relief to be adjusted. It is an essential part of a working guitar, but decidedly inconvenient in a decorative frame joint.
While chopping out one lap joint, the chisel suddenly found the truss rod nut. That was a very close call. Fortunately, the tool survived, and the lesson was obvious: there was steel in there, so all subsequent cuts needed a good deal more caution.
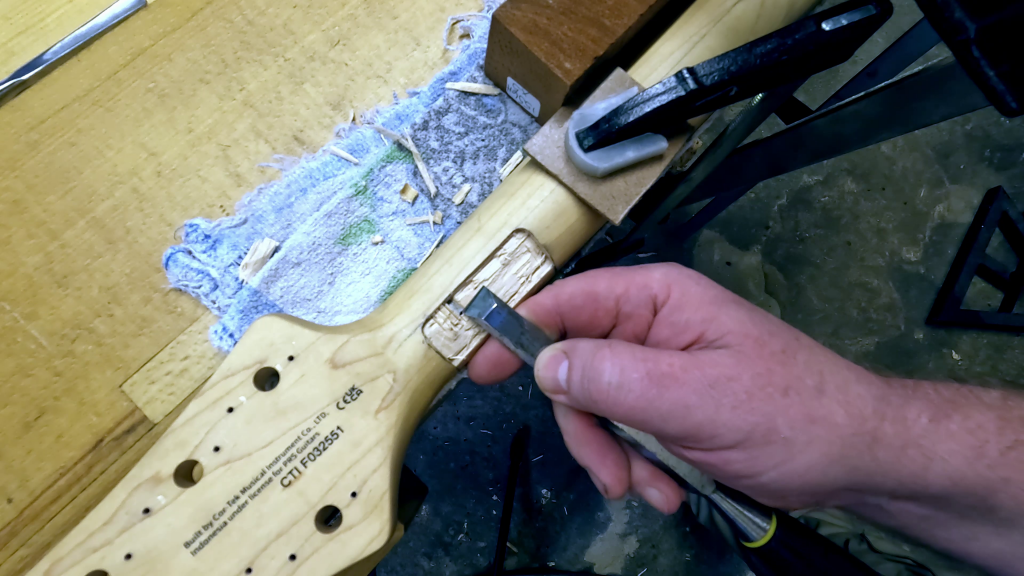
The joints were modified with small pockets and chamfers to clear the truss rod hardware. A half-round file was especially useful for refining these shaped clearances. Once fitted, the necks sat together neatly enough that the slightly hidden gaps were not noticeable from the front.
After repeating this process four times, each joint was numbered. It became rather like an IKEA kit, except with more chisels and considerably less Swedish confidence.
Cutting the Mirror Rebate
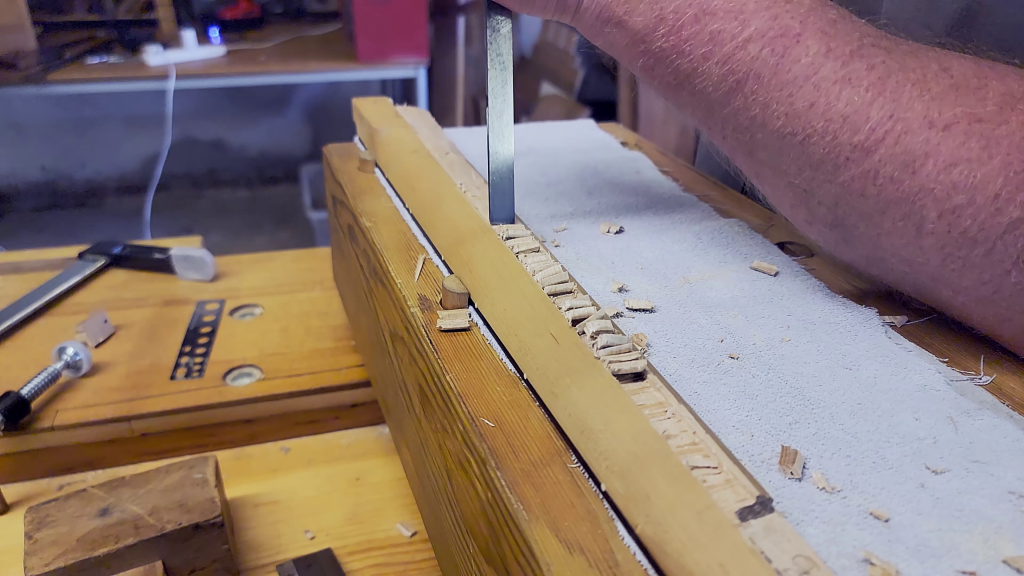
With the frame dry assembled, the next job was cutting a rear rebate into each neck. This recess would allow the mirror to sit behind the fretboards rather than merely being stuck on the back.
The internal opening was roughly 440 mm, so the mirror was planned at approximately 455 mm square to provide a bit of fitting tolerance. The rebate was marked a few millimetres above the rosewood fretboard, leaving a narrow maple border visible above the mirror.
The lines were first deeply scribed with a marking knife. This produces a clean edge and gives the chisel something positive to work against. A shallow knife wall was then cut along the line, helping prevent breakout as material was removed.
The necks were awkward to hold because of their rounded shapes. A tall, heavy chopping platform, known in the workshop as the “altar of Thor”, made life much easier. Bench dogs, a cloth pad and a solid stop kept each neck from rolling about while the rebate was worked.
Removing the Truss Rods
The rebate needed to be deep enough for the mirror, but the truss rods ran right through the area that had to be excavated. Working by hand had one major advantage here. A router and steel rod make a fairly expensive noise together. A chisel gives warning before the damage gets too dramatic.
Once both ends of a truss rod were exposed, a Dremel with a small steel burr cut through the rod near the nut. The rod could then be gripped and pulled free. It was not the prettiest operation, but it would all be hidden within the finished Paul Reed Smith Mirror.
With the steel out of the way, the rebate could be finished safely. A wooden rebate plane struggled with the hard maple and produced chatter. A vintage Preston bullnose plane helped refine the walls, but a simple small Record bullnose plane did much of the useful work on the flat surface.
The important feature was a clean, sharp visible edge. The back would never be on show, but the line where mirror met maple had to look deliberate.
Cutting the Mirror: The First Lesson
The first mirror blank was 450 mm by 600 mm, so it needed trimming down to a 450 mm square. Glass cutting is one of those skills that looks easy right up until the glass decides otherwise.
The first cut was not my finest hour. The broken edge was a little more expressive than planned, although it was possible to tidy parts of it with flush-cut pincers and a diamond plate.
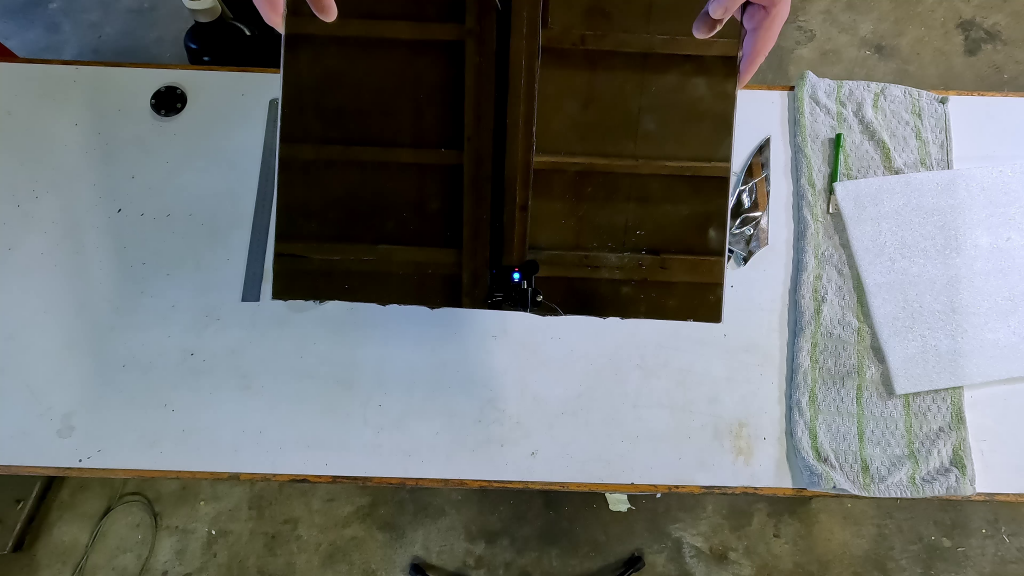
The second attempt was much better. The straightedge was clamped securely at both ends, the cutter was pressed firmly along the score, and the glass broke along a cleaner line. The lesson was clear enough: support the work properly, score it confidently, and avoid the sort of hesitant prodding that encourages glass to form its own opinions.
Dry Fitting and the Broken Mirror Incident
Before glue-up, the frame and mirror were dry fitted. This revealed a few minor adjustments still needed. Some fretboard edges required blending with a slight radius, and a few joints needed shims to bring their surfaces into line.
It also revealed a rather important fact: this was a difficult thing to glue together. If the frame twisted even slightly, the mirror could crack under stress.
In a moment of questionable wisdom, the necks were gently clamped against the mirror to keep everything aligned during assembly. Metal clamps, wood and a sheet of glass. There is only one sensible outcome there.
The mirror broke.
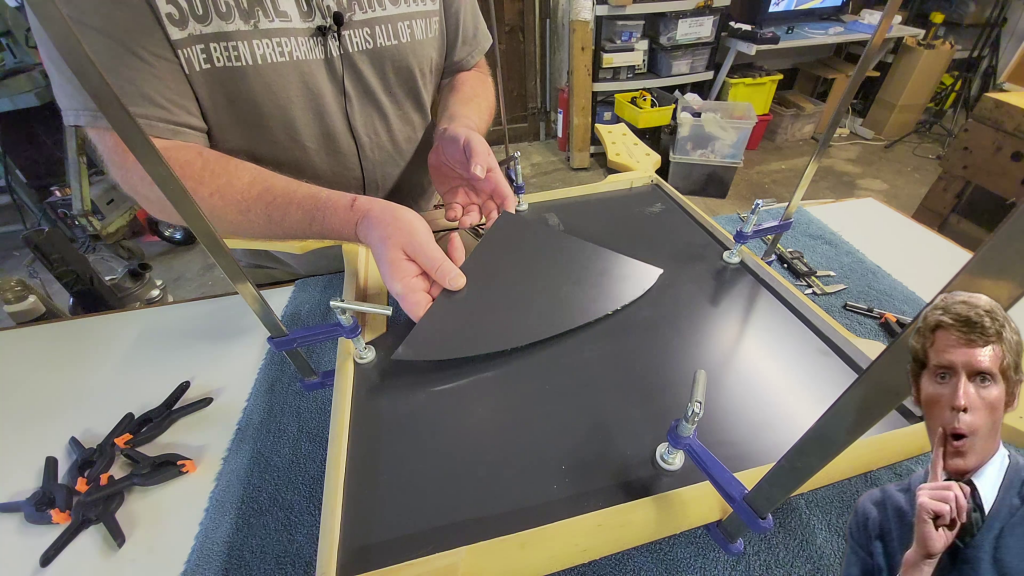
A replacement was ordered, along with a better diamond-tipped glass cutter, because blaming the tools is a long-standing and entirely respectable workshop tradition. The new mirror was cut successfully and protected with sticky-backed plastic while the rest of the Paul Reed Smith Mirror was completed.
Etching the PRS Bird into the Mirror
The mirror itself needed a bit more theatre. A template was made from the PRS 12th-fret bird inlay, then used to mark an outline on the back of the mirror.
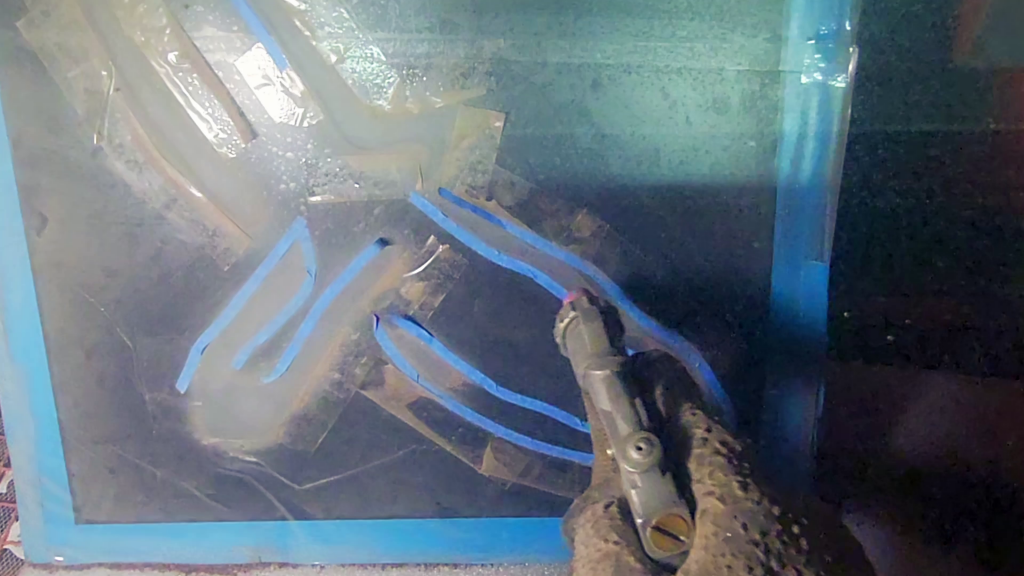
The back of the glass was covered in sticky-backed masking material. The bird shapes were traced and carefully cut out with a fresh scalpel blade. Only the masking film needed cutting, not the mirror backing beneath it.
The front of the mirror was also protected. This was essential because stray blasting media reaching the front would frost areas that were meant to remain reflective.
The exposed bird shapes were then grit blasted at low pressure. The blasting removed the mirror backing in those areas, creating frosted glass bird silhouettes when seen from the front. The masking needed reinforcing in places as the grit gradually wore it away, but the finished result came out rather well.
The etched detail gives the Paul Reed Smith Mirror a proper connection to the guitars without turning it into a giant logo. The fretboard birds remain the main feature of the frame, while the central bird design appears when the lighting is switched on.
Adding RGB Backlighting
To illuminate the etched glass, RGB COB LED strip was fitted behind the mirror. COB strip places the LEDs closely together beneath a coating, making the light appear more continuous than conventional strip lighting.
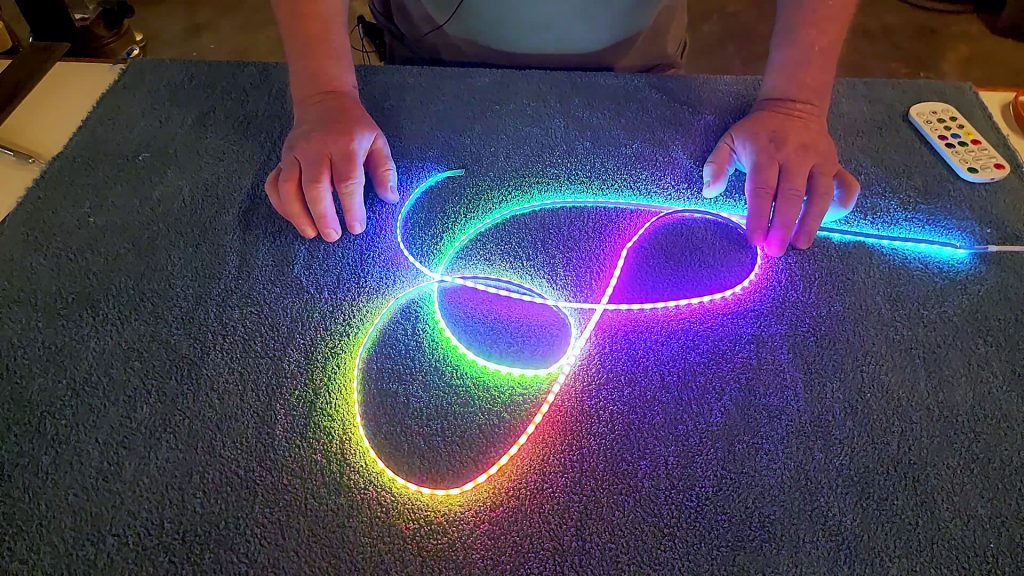
The strip was arranged around the inside of a shallow rear box. Its changing colours complement the iridescent mother of pearl style bird inlays in the necks, which already catch the light in lovely blues, greens and pinks.
A simple remote control allows different colours and lighting modes. The effect is subtle enough in a single colour, or rather more lively if one is in the mood for a bit of multicoloured goodness.
Building the Rear Box and Hanging the Frame
The rear box was made from 3 mm plywood to keep the whole assembly reasonably light. It was reinforced with internal bracing, including beech corner supports and pine offcuts around the edges where the back panel attached.
A cable slot was cut into the back so the LED power lead could exit neatly. A slim metal French cleat was fitted for hanging. This kept the Paul Reed Smith Mirror close to the wall while providing a secure mounting method.
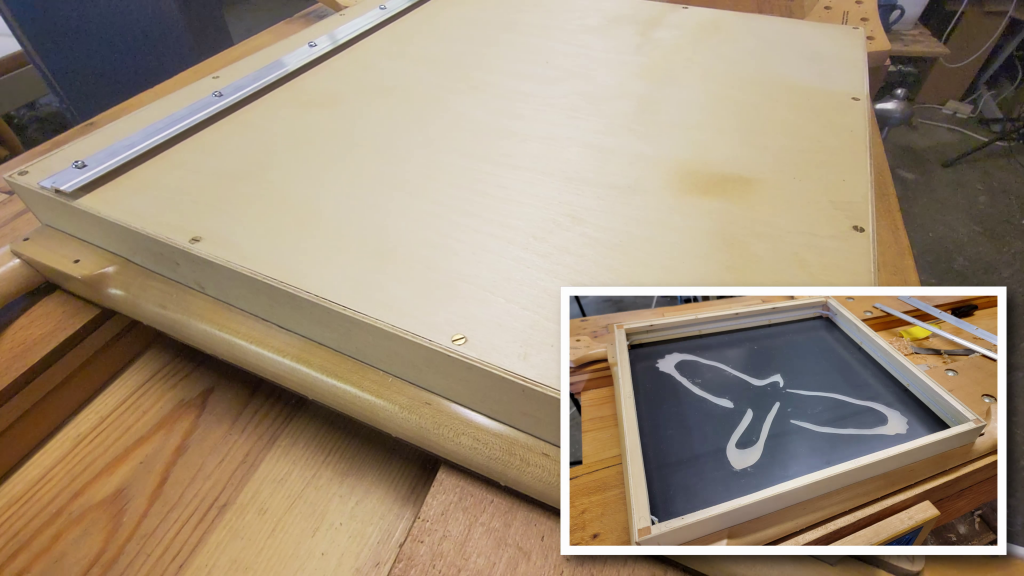
The rear box also solved another practical problem. Guitar headstocks rise slightly from the line of the neck, so the box naturally spaces the frame away from the wall and prevents those raised sections from causing trouble.
Finally, the wood received a thin coat of Danish oil. It was enough to enrich the maple and tidy the overall appearance without making the necks look overly glossy or artificial.
A Second Life for Beautiful Rejects
The finished Paul Reed Smith Mirror is a proper workshop salvage project. It retains the detail and craftsmanship of the original parts while becoming something entirely different, useful and rather unusual.
There are still plenty of necks left, which means there may be other possibilities lurking on the bench. They could become furniture handles, wall hooks, display pieces, or something nobody has thought of yet.
That is the enjoyable bit about making things in a shed. A rejected component is not necessarily rubbish. Sometimes it is simply waiting for the right excuse to become something else.
The mirror is now hanging in the reception area at the PRS UK Head Office – I hope they enjoy looking at it.